Trophy Buck Quilt Along—Week 1
Posted by Christine Hobbs on

I'm so glad you're joining us! Together, over the next eleven weeks, we’re going to break down this big boy from 112 templates into a manageable project.
What? 112 templates? And, some of them have multiple pieces?
Are you crazy?
I know. I know! That sounds like a lot. But, if you take it one piece at a time it’s totally doable! So, let's get started.
Full Schedule
WEEK 1–Gather Materials and Prep Pattern
WEEK 2–Panel 1 Templates
WEEK 3–Panel 1 Templates and Assembly
WEEK 4–Panel 2 Templates
WEEK 5–Panel 2 Templates and Assembly
WEEK 6–Panel 3 Templates
WEEK 7–Panel 3 Templates and Assembly
WEEK 8–Catch Up or Take a Break!
WEEK 9–Panel 4 Templates
WEEK 10–Panel 4 Templates and Assembly
WEEK 11–Sew Top
If you're like me and get a great sense of accomplishment when scratching items off a to-do list, download this handy-dandy Trophy Buck QAL Checklist and check off your progress to your heart's content!

Foundation Paper Piecing
There are a multitude of techniques for foundation paper piecing. Our Basic Paper Piecing Instructions are a great place to start you want to try a new technique or simply need a refresher.
Week 1
This week is our prep week. If you haven’t already done so, you'll need to...
STEP 1: Gather the suggested supplies.
- Trophy Buck pattern (PDF download or printed pattern)
- Fabric
- Scissors (for cutting paper)
- Scissors (for trimming threads)
- Cutting mat
- Rotary cutter
- Ruler (12-inch Add-A-Quarter ruler recommended)
- Seam ripper
- Sewing machine with stitch length adjustment
- Iron
- Pressing board or mat
- Pins and/or fabric clips
- Water-soluble fabric glue stick (optional)
STEP 2: Prep your fabric. There are two distinct camps about prepping fabric. I happen to be in the wash everything first camp! This is partly because that's how my mom taught me, but it's also because I've encountered fabrics that shouldn't have bled but did and had fabrics shrink way more than I'd anticipated. Considering all of that, I figure why take the risk. If you choose to not wash your fabric; however, it's not the end of the world.
By now, you've hopefully come across the "My Fabric Choices" page in the pattern. I use the upper half to provide a visual reminder about which fabric goes each pattern code and the bottom half as tags to pin or clip to my fabric so it's easier to find what I'm looking for (and hopefully make fewer mistakes!).


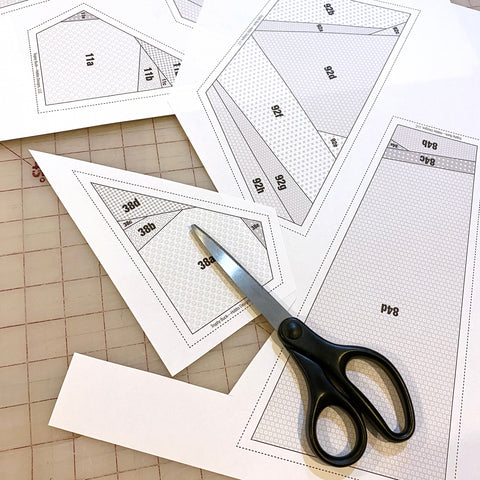
STEP 3: Duplicate the templates at 100% and rough cut them out. I'm not overly picky at this stage and trim them to about a quarter inch from the outer seam allowance line (dotted). Just make certain you're not using your good fabric scissors! Since we're going to be going through the templates from number 1 to 112, I'd also sort my patterns and arrange them numerically at this time.

STEP 4: Clean your workspace if it’s a disaster from your last project—like mine usually is! Next Monday will be here before you know it!
Weekly Challenge
Share a photo of your fabric pull with the official hashtag #trophybuckquiltalong.
It's Not Too Late
If you're still wanting to participate in the quilt along and are needing a kit, check out It's Sew Tempting and Quilting Connection in the U.S. In Canada, Mad About Patchwork is the place to go. Or, check your stash to see if you could pull together your own creation—whether it be traditional, soft and subtle, or bold and crazy!


This is going to be so much fun! I love the checklist!